How to Convert JPG and PNG to Layered PSD: A Practical Guide
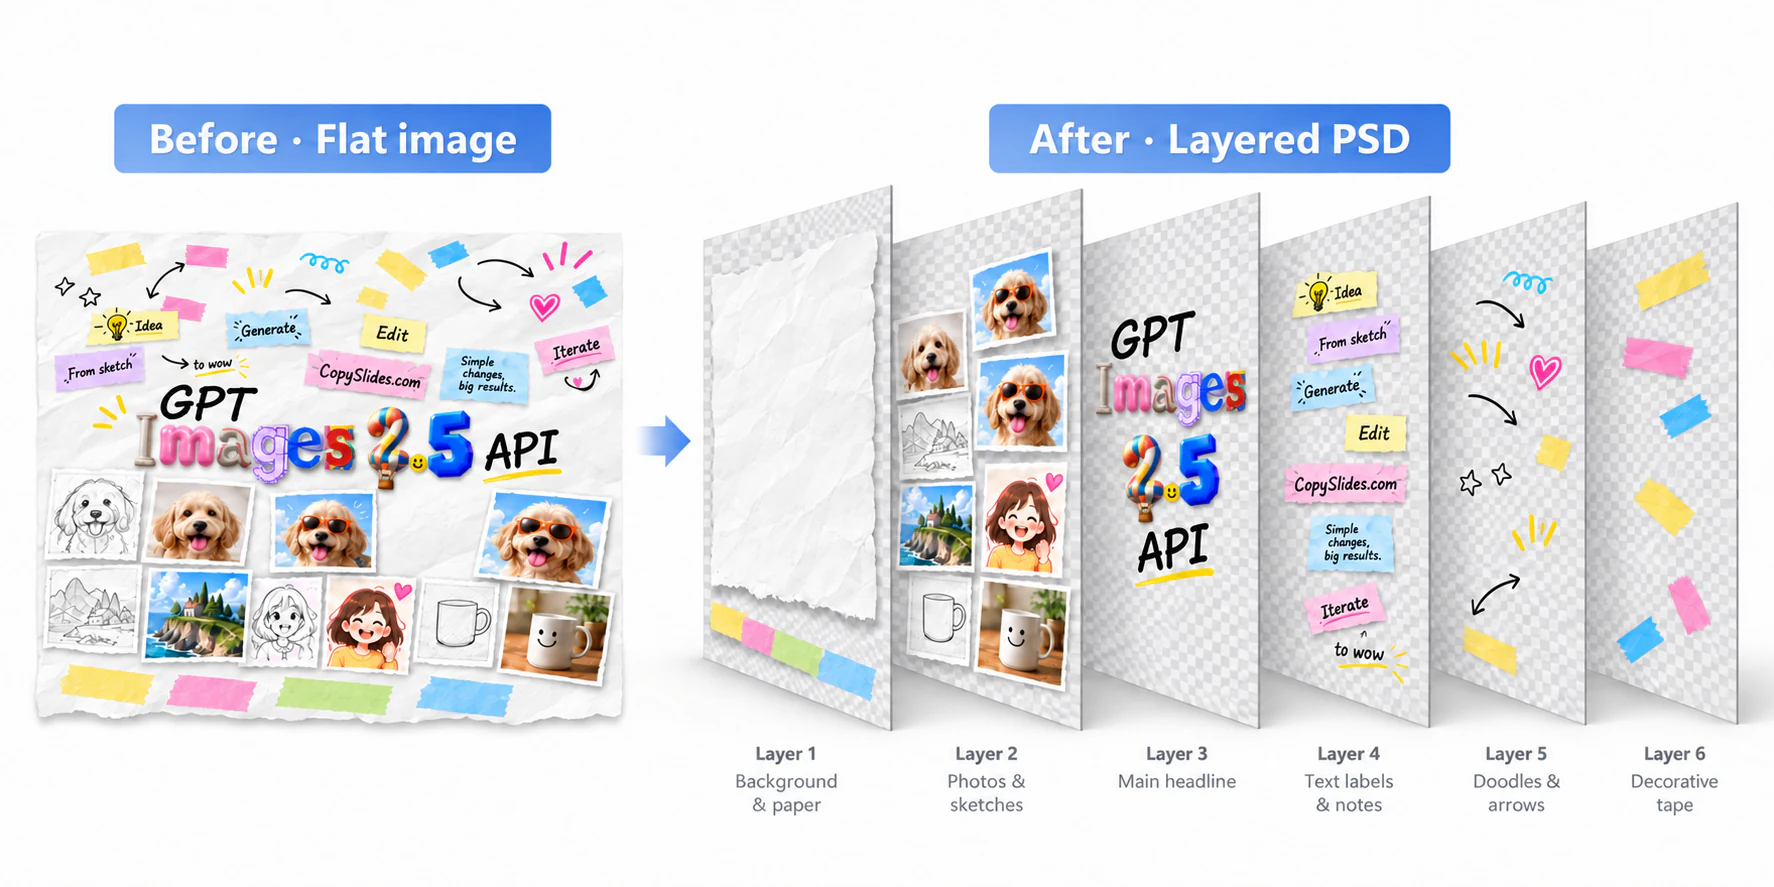
Creative collage: imagery, lettering, paper, and decorative elements shown as separate layers.
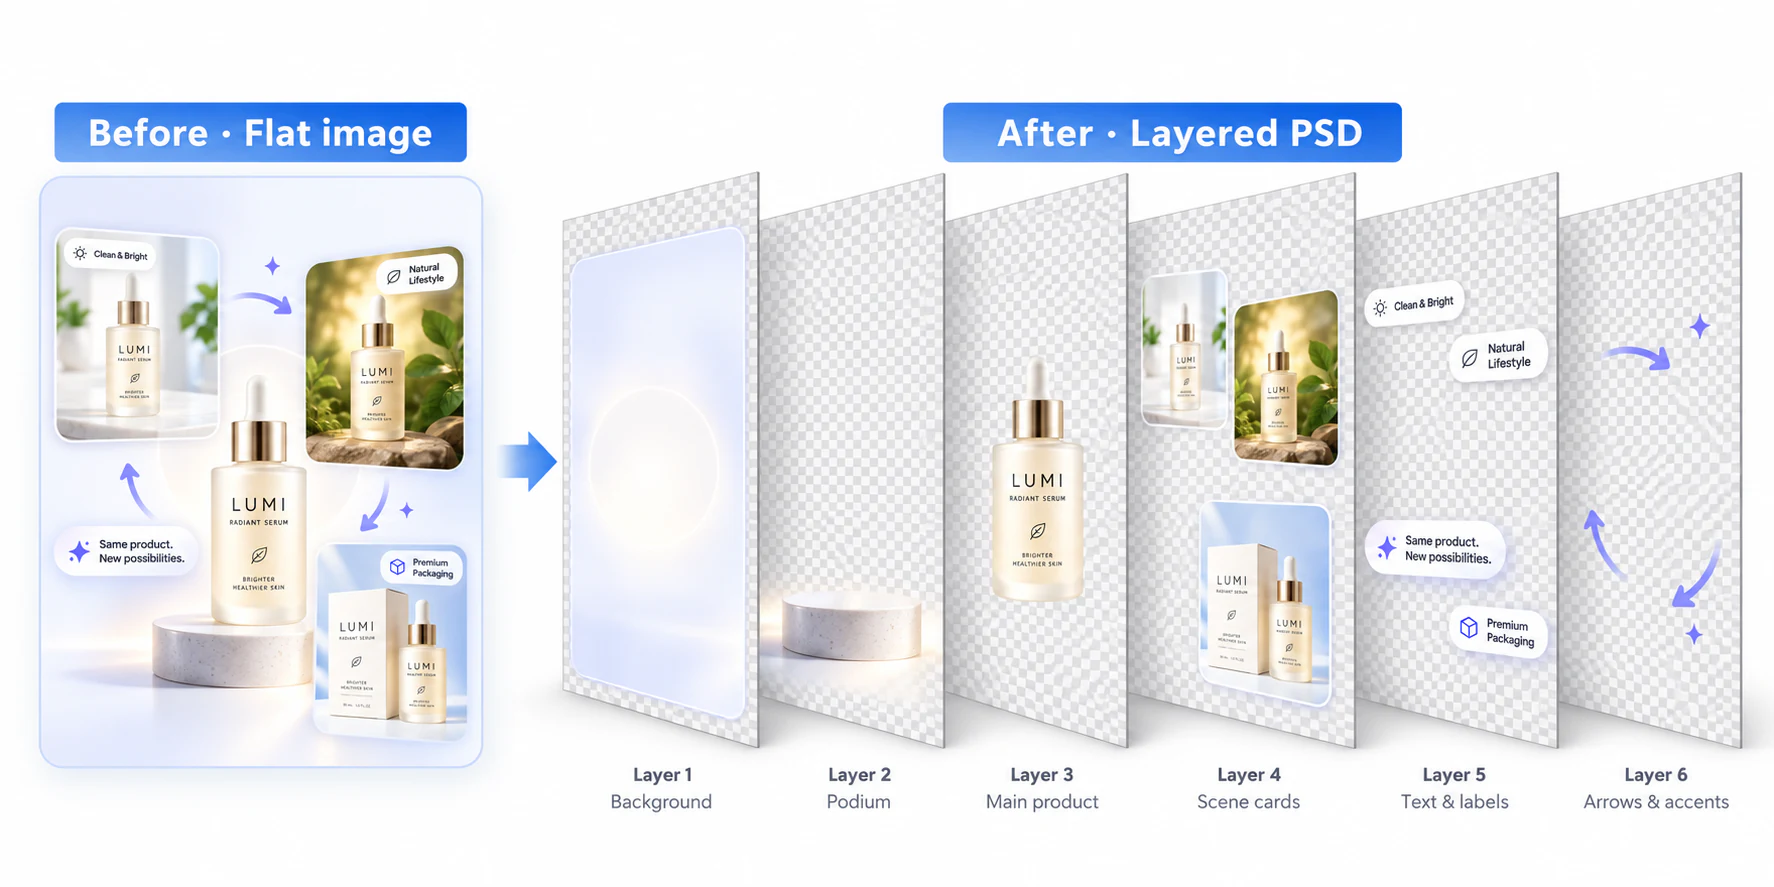
Product advertising: background, podium, product, scene cards, labels, and accents.
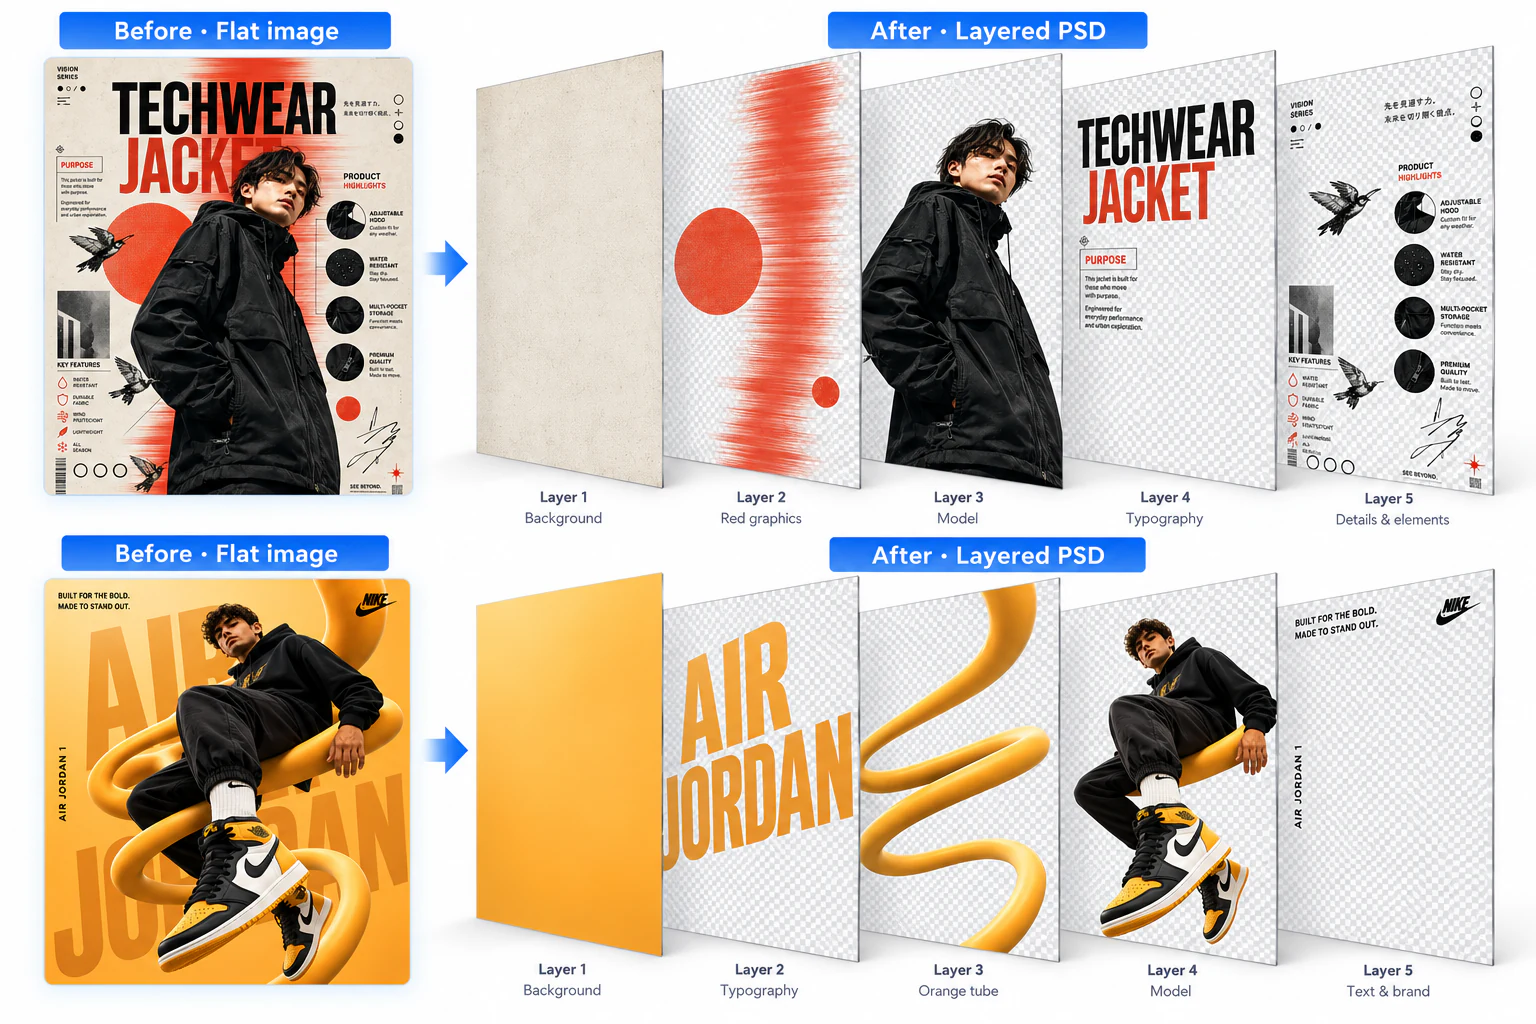
Fashion posters: backgrounds, models, typography, and graphic details. These three images are illustrative layer breakdowns from our landing page, not measured conversion results. The workspace screenshots below show the real CopySlides interface.
To convert a JPG or PNG into a layered PSD, you need to reconstruct layers, not simply change the file format. CopySlides separates visual content into transparent pixel layers and recreates supported text as native Photoshop text layers. You can inspect the result, download a PSD, and continue editing in Photoshop or the integrated Photopea editor.
This guide explains how to use Image to PSD, what remains editable, and how to check the result before using it in a design project.
Saving as PSD versus rebuilding layers
A JPG or ordinary PNG contains the rendered image, not the original design's text boxes and object hierarchy. Saving that image as a PSD creates a Photoshop document, but does not recover the separate objects that existed before the design was flattened. Adobe explains that PSD preserves layers while JPEG does not.
AI reconstruction creates a new layer structure from the visible image. It does not recover a missing original source file. Portions hidden behind another object, the exact original font, and the designer's original grouping may be impossible to infer reliably.
| Output | What you can change |
|---|---|
| A flat image saved as PSD | The image as a whole; its text remains pixels |
| Transparent pixel layers | Move, hide, mask, or retouch the separated artwork in an editor |
| Native text layers | Change wording, font, size, and color in a compatible editor |
| Original authoring file | The original editable structure, if you still have it |
Use the original design file whenever it is available. Reconstruction is useful when all you have is a screenshot, exported graphic, or flattened slide.
Step 1: Prepare a clear JPG or PNG
Start with the highest-quality source you own or have permission to edit. Avoid taking a screenshot of an already compressed screenshot. Small lettering, heavy JPEG artifacts, and decorative fonts make text recognition less reliable.
CopySlides Image to PSD accepts PNG and JPEG; PDF is not a direct input for this tool. For a PDF page, export the relevant page as an image first. If your goal is an editable presentation rather than a Photoshop document, use Image to Editable PowerPoint.
Keep web uploads below 4 MB for the most reliable experience with the current hosted upload path. The model pipeline's larger file allowance does not override the hosting platform's request-size limit. Images must also stay within the displayed decoded-pixel limit. Transparent inputs are composited onto white for processing; do not expect their original alpha channel to survive unchanged.
Step 2: Upload your image and start conversion
Open the Image to PSD workspace. Drop an image into the upload area, choose a file, or paste an image from the clipboard. Sign in when prompted and check that your account has enough credits.

Actual workspace screenshot. Start with one PNG or JPEG.
Review the source preview, then select Convert to PSD. Advanced options let you change the number of decomposition passes. Start with the default: extra passes take longer and do not guarantee a cleaner result or a separate layer for every object.
The interface reports processing stages such as reading text, removing accepted text pixels, separating visual content, and writing the PSD. Processing time depends on image complexity and the queue; there is no fixed completion-time promise. The current pricing rule is one credit per successful conversion, with a balance check before submission.
Step 3: Inspect the layers at the original coordinates
When conversion finishes, the image appears beside a layer list. Fit displays the complete canvas inside the preview window. Choose 100% from the zoom menu to inspect fine details at actual CSS-pixel scale.

Previously captured screenshot of the real layer-preview demo using a controlled bilingual sample: five layers, including two native text layers. The current workspace has a more compact toolbar, but the distinction between pixel and text layers is the same. This is not a guaranteed layer count for other images.
Use Original to switch between the source and reconstruction. Toggle the eye beside a layer to see what it contains. Select a row to inspect its details, or double-click to isolate it. Isolation preserves the original canvas coordinates; it does not move the selected element to the center.
Check these details before downloading:
- Text accuracy: read names, numbers, punctuation, and mixed-language lines. OCR can misread characters even when the text is editable.
- Duplicate text: look for original lettering left underneath reconstructed text.
- Background repair: inspect the areas where accepted text was removed, especially over textures or photographs.
- Layer boundaries: look for halos, missing edges, and unrelated elements grouped on the same layer.
- Alignment: compare the composition at Fit, then inspect text size and spacing at 100%.
Visibility changes in the CopySlides preview are for inspection only. They do not change the downloadable PSD. To remove or reposition elements in the saved file, edit the PSD in a compatible editor.
Step 4: Download PSD or choose ZIP
The download controls sit at the bottom of the layer panel. PSD is the default format. Use the format selector to choose ZIP when you also need the generated layer images, preview, and manifest.
The manifest describes the output rather than promising that each layer corresponds to one semantic object. A single pixel layer may contain several graphics. Text layers are separate only where the pipeline accepts the recognition and layout result.
Keep the original image and the first exported PSD as references. Save later edits as a new version so you can compare them with the reconstruction.
Step 5: Continue editing in Photoshop or Photopea
For desktop Photoshop, open the downloaded PSD normally. Select a text layer to change its wording or styling. Pixel artwork remains raster content: a separated circle or logo is not automatically a Photoshop vector shape.
The workspace's Editor button opens a new CopySlides page containing Photopea, a third-party online editor. CopySlides passes the PSD to the embedded editor. This is not a self-hosted Photoshop instance, and the free third-party interface may display advertising.
Export your edited PSD from Photopea before leaving. Changes are not automatically saved back to CopySlides, and the header's Download original PSD link still downloads the unedited conversion. Photopea documents its own opening and saving workflow.
Fonts are not embedded in our PSD exports. The reconstruction uses an approximate font, including Noto Sans CJK SC for supported bilingual text. Missing fonts can change text appearance when an editor re-renders a layer. Photopea supports loading TTF and OTF font files; only load fonts you are licensed to use.
What if some text stays as an image?
That can be an intentional fallback. Rotated lettering, complex artistic text, multicolor text, or uncertain OCR results may stay in pixel artwork rather than being erased and replaced incorrectly. Review the conversion notes for the reported reason.
Try a cleaner source or crop to the relevant design area and convert again. For a small number of difficult labels, manually recreating the text in Photoshop may be more reliable than repeatedly increasing decomposition passes. Always proofread the result; editable text is not automatically correct text.
Common questions
Can I convert a JPG to PSD without Photoshop?
Yes. You can generate and download the layered PSD in CopySlides without installing Photoshop. The optional Editor entry uses Photopea. Desktop Photoshop is only needed if you choose it for subsequent editing.
Does PNG to PSD make every object editable?
No. CopySlides produces transparent pixel layers and supported native text layers. It does not guarantee one layer per object or convert all graphics into vectors, smart objects, or editable charts.
Will the result match the original exactly?
Not necessarily. Font substitution, OCR, text erasure, and graphic separation can introduce differences. Compare the original with the reconstruction before relying on the file for a final deliverable.
What should I do if the online editor stops responding?
Keep the original PSD download. If Photopea becomes unresponsive, try opening that file in a standalone editor session or Photoshop. Do not refresh a session containing unsaved edits unless you are prepared to lose those changes.
Is the trial the same as unlimited free conversion?
No. Availability depends on your account's credits. Check your balance and the current pricing before converting; the guide does not promise unlimited free exports.
Try it with one image
Choose a clear screenshot with a few text lines and distinct visual elements. Convert it to a layered PSD, compare the result with the source, and inspect the text layers before editing. A usable reconstruction starts with checking what the tool actually separated.